
Instellingen van systeem-BIOS
WAARSCHUWING:
De afbeelding van de BIOS-vensters in dit gedeelte
zijn slechts informatief bedoeld. De werkelijke schermen verschillen
afhankelijk van het model en de regio.
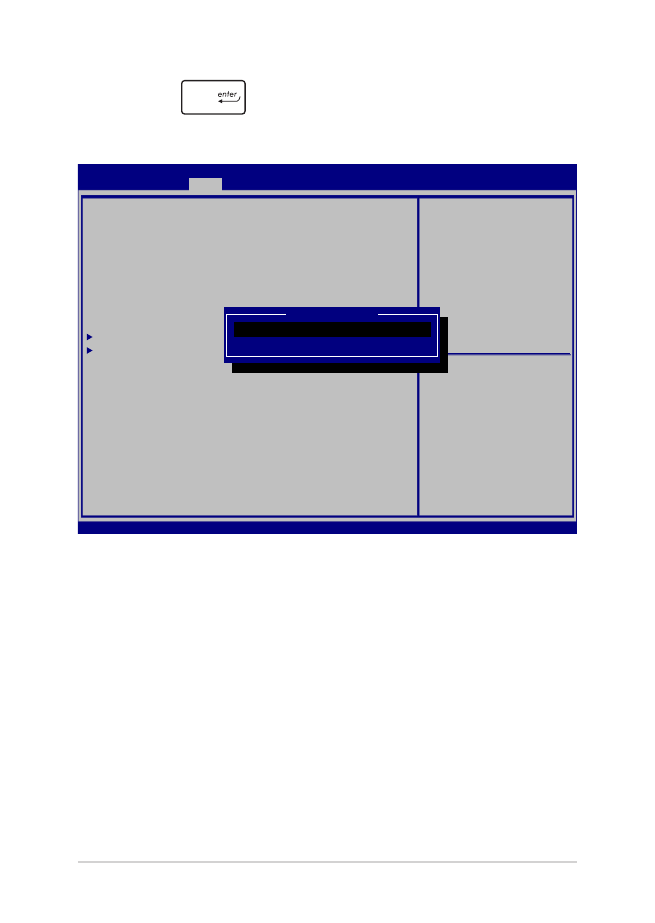
Boot (Opstarten)
In dit menu kunt u de prioriteiten voor opstarten instellen. Zie de
volgende procedures bij het instellen van de opstartprioriteit.
1. Selecteer
Boot Option #1 (Opstartoptie 1) op het scherm Boot
(Opstarten).
Aptio Setup Utility - Copyright (C) 2015 American Megatrends, Inc.
Main Advanced
Boot
Security Save & Exit
Version 2.16.1243 Copyright (C) 2015 American Megatrends, Inc.
Boot Configuration
Fast Boot [Enabled]
Launch CSM [Disabled]
Driver Option Priorities
Boot Option Priorities
Boot Option #1 [Windows Boot Manager]
Add New Boot Option
Delete Boot Option
Sets the system boot
order
→
← : Select Screen
↑↓ : Select Item
Enter: Select
+/— : Change Opt.
F1 : General Help
F9 : Optimized Defaults
F10 : Save & Exit
ESC : Exit
66
Gebruikershandleiding notebook PC
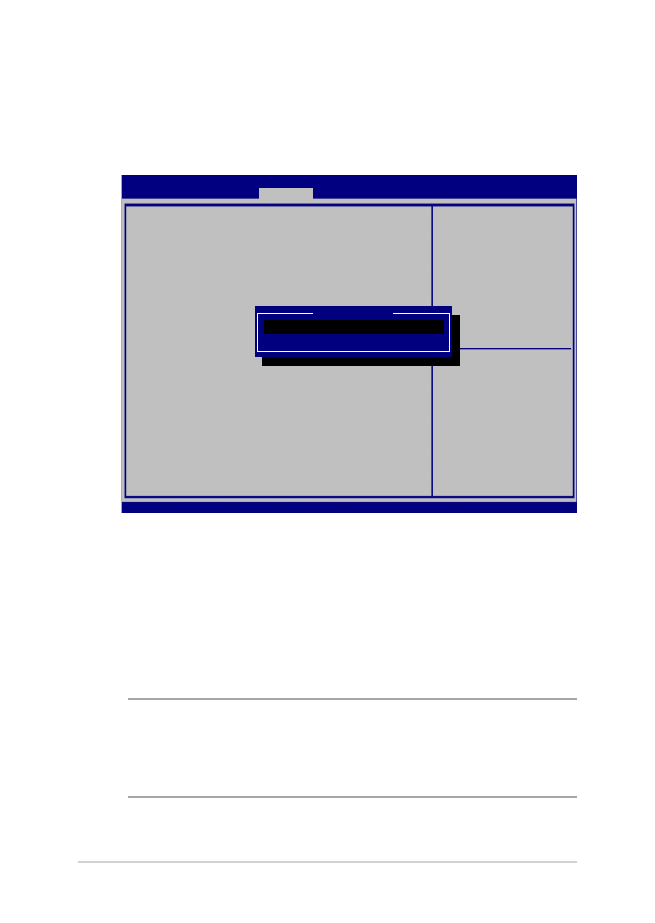
2.
Druk op
en selecteer een apparaat als Boot Option #1
(Opstartoptie 1).
Aptio Setup Utility - Copyright (C) 2015 American Megatrends, Inc.
Main Advanced
Boot
Security Save & Exit
Version 2.16.1243 Copyright (C) 2015 American Megatrends, Inc.
Boot Configuration
Fast Boot [Enabled]
Launch CSM [Disabled]
Driver Option Priorities
Boot Option Priorities
Boot Option #1 [Windows Boot Manager]
Add New Boot Option
Delete Boot Option
Sets the system boot
order
→
← : Select Screen
↑↓ : Select Item
Enter: Select
+/— : Change Opt.
F1 : General Help
F9 : Optimized Defaults
F10 : Save & Exit
ESC : Exit
Boot Option #1
Windows Boot Manager
Disabled

Gebruikershandleiding notebook PC
67
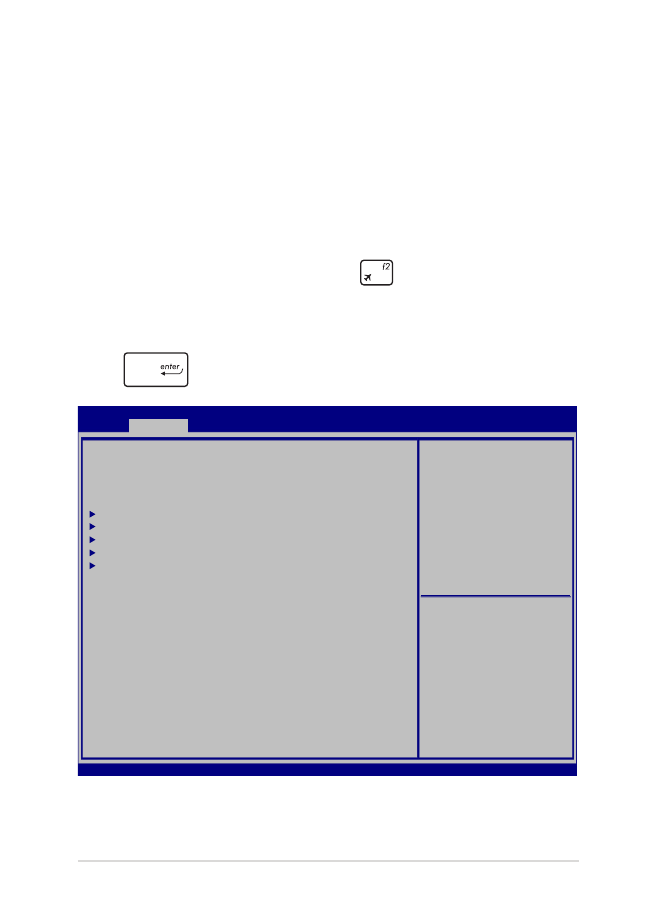
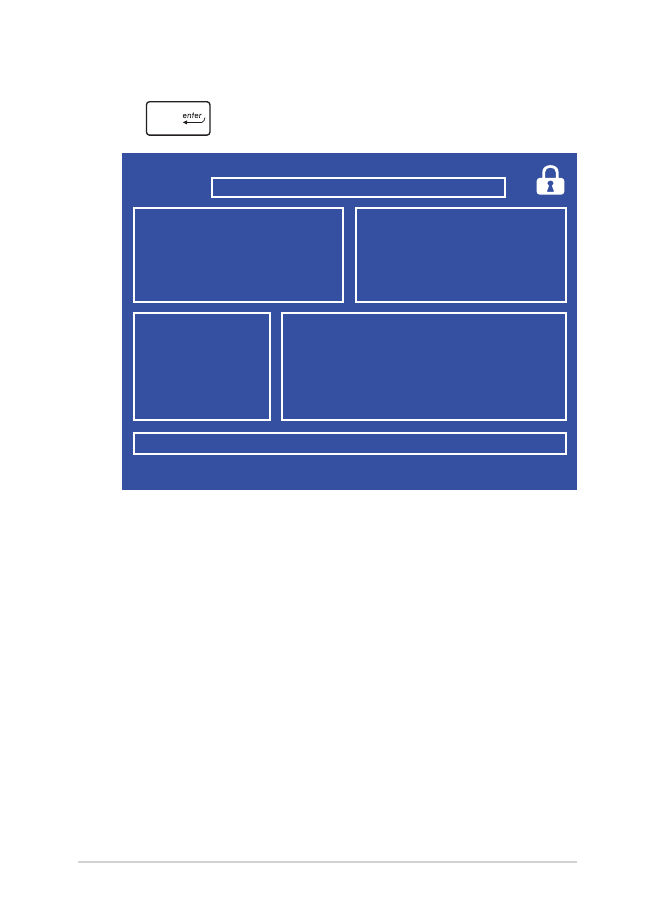
Security (Beveiliging)
Met dit menu kunt u het beheerders- en gebruikerswachtwoord voor
uw notebook instellen. Hiermee beheert u ook de toegang tot de
harde schijf van de notebook, de invoer/uitvoer (I/O) interface, en de
USB-interface.
OPMERKING
:
•
Als u een User Password (gebruikerswachtwoord) instelt, wordt
u hiernaar gevraagd voordat u naar het besturingssysteem van uw
notebook gaat.
•
Als u een Administrator Password (beheerderswachtwoord)
instelt, wordt u daarnaar gevraagd voordat u het BIOS opent.
Aptio Setup Utility - Copyright (C) 2015 American Megatrends, Inc.
Main Advanced Boot
Security
Save & Exit
Version 2.16.1243 Copyright (C) 2015 American Megatrends, Inc.
Password Description
If ONLY the Administrator’s password is set, then
this only limits access to Setup and is only asked
for when entering Setup. If ONLY the user’s password
is set, then this is a power on password and must be
entered to boot or enter Setup. In Setup, the User
will have Administrator rights.
Administrator Password Status NOT INSTALLED
User Password Status NOT INSTALLED
Administrator Password
User Password
HDD Password Status : NOT INSTALLED
Set Master Password
Set User Password
I/O Interface Security
System Mode state User
Secure Boot state Enabled
Secure Boot Control [Enabled]
Key Management
Set Administrator
Password. The password
length must be in the
following range:
Minimum length 3
Maximum length 20
Must type with character:
a-z, 0-9
→
← : Select Screen
↑↓ : Select Item
Enter: Select
+/— : Change Opt.
F1 : General Help
F9 : Optimized Defaults
F10 : Save & Exit
ESC : Exit

68
Gebruikershandleiding notebook PC
Het wachtwoord instellen:
1.
Selecteer in het scherm Security (Beveiliging) de optie Setup
Administrator Password (Beheerderswachtwoord instellen)
of User Password (Gebruikerswachtwoord).
2.
Geef een wachtwoord op en druk op
.
3.
Typ het wachtwoord opnieuw en druk op
.
Het wachtwoord wissen:
1.
Selecteer in het scherm Security (Beveiliging) de optie Setup
Administrator Password (Beheerderswachtwoord instellen)
of User Password (Gebruikerswachtwoord).
2.
Voer het huidige wachtwoord in en druk op
.
3.
Laat het veld Create New Password (Nieuw wachtwoord
maken) leeg en druk op
.
4.
Klik op Yes (Ja) in het bevestigingsvak en druk op
.

Gebruikershandleiding notebook PC
69
I/O Interface Security (beveiliging)
In het menu Security (Beveiliging) kunt u de I/O Interface
Security openen om interfacefuncties van uw notebook te ver- or
ontgrendelen.
De I/O-interface vergrendelen:
1.
Kies op het scherm Security (Beveiliging) de optie I/O
Interface Security (I/O-interfacebeveiliging).
2.
Selecteer een interface die u wilt vergrendelen en klik op
.
3. Selecteer
Lock (Vergrendelen).
Aptio Setup Utility - Copyright (C) 2015 American Megatrends, Inc.
Main Advanced Boot
Security
Save & Exit
Version 2.16.1243 Copyright (C) 2015 American Megatrends, Inc.
I/O Interface Security
LAN Network Interface [UnLock]
Wireless Network Interface [UnLock]
HD AUDIO Interface [UnLock]
USB Interface Security
If Locked, LAN controller
will be disabled.
→
← : Select Screen
↑↓ : Select Item
Enter: Select
+/— : Change Opt.
F1 : General Help
F9 : Optimized Defaults
F10 : Save & Exit
ESC : Exit
LAN Network interface
Lock
UnLock
70
Gebruikershandleiding notebook PC
USB-interfacebeveiliging
Via de I/O Interface-beveiliging kunt u ook de USB Interface-
beveiliging openen om poorten en apparaten te vergrendelen of
ontgrendelen.
De USB-interface vergrendelen:
1.
Kies op het scherm Security (Beveiliging) de optie I/O
Interface Security (I/O-interfacebeveiliging) > USB
Interface Security (USB-interfacebeveiliging).
2.
Selecteer een interface die u wilt vergrendelen en klik op
Lock (Vergrendelen).
OPMERKING
: Het instellen van de USB Interface op Lock
(Vergrendelen) vergrendelt en verbertt ook de External Ports (Externe
poorten) en andere apparaten die zijn opgenomen onder USB Interface
Security.
Aptio Setup Utility - Copyright (C) 2015 American Megatrends, Inc.
Main Advanced Boot
Security
Save & Exit
Version 2.16.1243 Copyright (C) 2015 American Megatrends, Inc.
USB Interface Security
USB Interface [UnLock]
External Ports [UnLock]
CMOS Camera [UnLock]
Card Reader [UnLock]
If Locked, all USB device
will be disabled
→
← : Select Screen
↑↓ : Select Item
Enter: Select
+/— : Change Opt.
F1 : General Help
F9 : Optimized Defaults
F10 : Save & Exit
ESC : Exit
USB interface
Lock
UnLock
Gebruikershandleiding notebook PC
71
Set Master Password (Hoofdwachtwoord instellen)
In het menu Security (Beveiliging) kunt u Set Master Password
(Hoofdwachtwoord instellen) gebruiken om de toegang tot de
harde schijf met een wachtwoord te beveiligen.
Het HDD-wachtwoord instellen:
1.
Klik op het scherm Security (Beveiliging) om Set Master
Password (Masterwachtwoord instellen)
2.
Voer een wachtwoord in en druk op
.
3.
Voer het wachtwoord opnieuw in als bevestiging en druk op
.
4.
Klik op Set User Password (Gebruikerswachtwoord
instellen) en herhaal de vorige stappen om het
gebruikerswachtwoord in te stellen.
Aptio Setup Utility - Copyright (C) 2015 American Megatrends, Inc.
Main Advanced Boot
Security
Save & Exit
Version 2.16.1243 Copyright (C) 2015 American Megatrends, Inc.
Password Description
If ONLY the Administrator’s password is set, then
this only limits access to Setup and is only asked
for when entering Setup. If ONLY the user’s password
is set, then this is a power on password and must be
entered to boot or enter Setup. In Setup, the User
will have Administrator rights.
Administrator Password Status NOT INSTALLED
User Password Status NOT INSTALLED
Administrator Password
User Password
HDD Password Status : NOT INSTALLED
Set Master Password
Set User Password
I/O Interface Security
Set HDD Master Password.
***Advisable to
Power Cycle System
after Setting Hard
Disk Passwords***
→
← : Select Screen
↑↓ : Select Item
Enter: Select
+/— : Change Opt.
F1 : General Help
F9 : Optimized Defaults
F10 : Save & Exit
ESC : Exit

72
Gebruikershandleiding notebook PC
Save & Exit (Opslaan en eindigen)
Selecteer voor het bewaren van de configuratie-instellingen Save
Changes and Exit (Wijzigingen opslaan en afsluiten) voordat u het
BIOS verlaat.
Aptio Setup Utility - Copyright (C) 2015 American Megatrends, Inc.
Main Advanced Boot Security
Save & Exit
Version 2.16.1243 Copyright (C) 2015 American Megatrends, Inc.
Save Changes and Exit
Discard Changes and Exit
Save Options
Save Changes
Discard Changes
Restore Defaults
Boot Override
Windows Boot Manager
Launch EFI Shell from filesystem device
Exit system setup after
saving the changes.
→
← : Select Screen
↑↓ : Select Item
Enter: Select
+/— : Change Opt.
F1 : General Help
F9 : Optimized Defaults
F10 : Save & Exit
ESC : Exit
Gebruikershandleiding notebook PC
73
Het BIOS opwaarderen:
1.
Controleer het model van de notebook en download het
nieuwste BIOS-bestand voor uw model van de website van ASUS.
2.
Sla een kopie van het gedownloade BIOS-bestand op een USB-
stick op.
3.
Steek de USB-stick in uw notebook.
4.
Herstart uw notebook en druk op
tijdens POST.
5.
Klik in de BIOS Setup op Advanced > Start Easy Flash
(Geavanceerd > Easy Flash starten) en druk vervolgens op
.
Aptio Setup Utility - Copyright (C) 2015 American Megatrends, Inc.
Main
Advanced
Boot Security Save & Exit
Version 2.16.1243 Copyright (C) 2015 American Megatrends, Inc.
Start Easy Flash
Internal Pointing Device [Enabled]
Wake on Lid Open [Enabled]
Power Off Energy Saving [Enabled]
SATA Configuration
Graphics Configuration
Intel (R) Anti-Theft Technology Corporation
USB Configuration
Network Stack
Press Enter to run the
utility to select and
update BIOS.
→
← : Select Screen
↑↓ : Select Item
Enter: Select
+/— : Change Opt.
F1 : General Help
F9 : Optimized Defaults
F10 : Save & Exit
ESC : Exit
74
Gebruikershandleiding notebook PC
6.
Zoek het gedownloade BIOS-bestand op de USB-stick op en druk
op
.
7.
Klik na de BIOS update op Exit > Restore Defaults (Afsluiten >
Standaardwaarden herstellen) om de standaardinstellingen
van het systeem te herstellen.
FSO
FS1
FS2
FS3
FS4
0 EFI
<DIR>
[←→] : Switch [↑↓] : Choose [q] : Exit [Enter] : Enter/Execute
Current BIOS
Platform : G800VI
Version : 101
Build Date : Oct 26 2015
Build Time : 11:51:05
New BIOS
FLASH TYPE : Generic Flash Type
ASUSTek EasyFlash Utility
Platform : Unknown
Version : Unknown
Build Date : Unknown
Build Time : Unknown

Gebruikershandleiding notebook PC
75